
 |
| image via Etsy shop SignsToLiveBy |
Alternate title: Silhouette, Gentille Silhouette
Chair signs are all over
Pinterest, and I knew that it was a project that I could very easily
DIY so I bought two wooden plaques at the Dollar Store and forgot about them
for a long time.
There are three main kinds of chair signs.
There are Mr. & Mrs. signs:
Bride and Groom signs:
 |
| image via Etsy shop OurHobbyToYourHome |

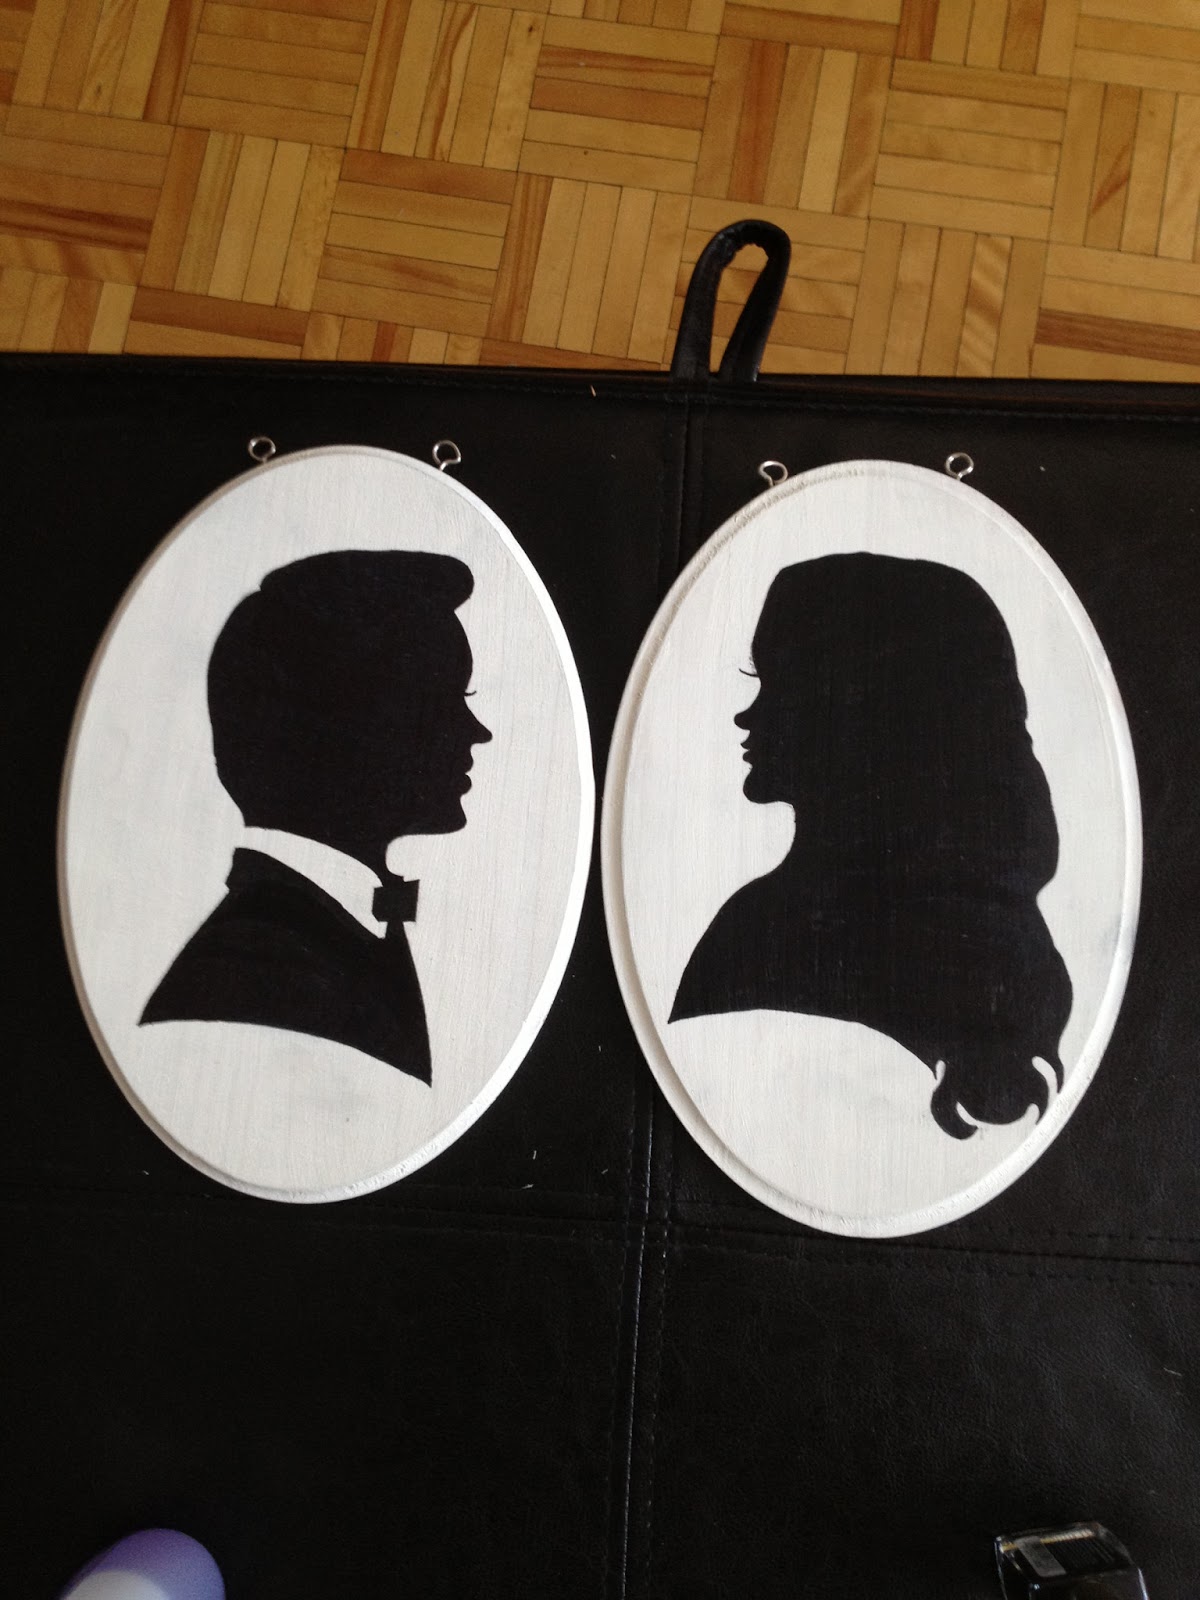
I decided to go with the Silhouettes even though I figured they would be much harder to make than the other two, but I also liked that they were different and fun.
I started off by painting the
plaques with some white acrylic paint. To achieve better coverage, I gave the
wood a few coats using a pouncer instead of a brush, to avoid rough brush
strokes.
.JPG)
Now, I’m not crazy enough to do
actual silhouettes of me and Mr. Waterfall, though if you wanted to, there are a
million tutorials on how to do it. Instead, I simply searched for silhouette
clipart online and tried to choose two that looked most like us. One thing I
really wanted was for my silhouette to have her hair down because I never wear my
hair in a chignon.
After I found two silhouettes
that I liked, I saved them on my computer and played around with their sizing
until I was happy with them. I printed the pictures out on my printer and using an HB pencil, blackened their back sides and taped them down where I wanted them:


After this point, I filled in the rest with a thicker sharpie, making sure to work in small, even strokes.

I repeated the steps for the second silhouette, finished it off with a coat of clear varnish and Voila!
Have you been pleasantly surprised with how a DIY project turned out?
No comments:
Post a Comment