Getting hospitalized two months before the wedding put a serious cramp in my style, yo! So, once I felt a bit better, read: well enough to hold up my glue gun, I knew it was time to get 'ma craft on! There were a few projects that, while completely non essential, I knew I really wanted to try and incorporate time (and health) willing, so I tackled those first. None of these projects is large enough to warrant its own post, so I've just compiled them all into one mega craft-plosion. Ready? Let's do this!
1. Ring Pillow:
One of the first pictures I saved into my inspiration folder (before I discovered the wonder that is Pinterest) was this super adorable flower ring pillow by Martha Stewart:
 |
| Swoon! Inage via Martha Stewart Weddings |
Sure, you can buy equally adorable ones on Etsy, except that I refuse to pay
upwards of $50 for what's basically a glorified cushion! No. Just. No. So, I
pranced over to my local fabric store to pick out some fabric and give this
baby a try. Tip: For small projects like this one, always check out the
discount bin. It's basically leftover scraps of fabric, at a fraction of the
cost! For $3, I was able to buy three different kinds of fabric!
I started out by hand sewing a
simple square pillow out of some beautiful grey silk. I’m not going to replicate the
steps because I figure that most of you know how to do this and if you don’t, there
are a million tutorials out there that will explain it better than I can. I made it fairly small because my ring
bearer is only three years old, so I wanted the pillow to look proportional. I didn’t know what fabric I
wanted for the petals, so I bought taffeta (as per Martha’s instructions) and a
gorgeous silk chiffon which I thought would be amazing and fluffy. Turns out
Martha knows best - not that I’m surprised; the chiffon was too soft and the
petals looked super sad and droopy. If you’re planning on making this, stick to
taffeta! I drew my petals on the fabric and cut them out with pinking shears
because I couldn’t find any scalloped ones. It took a while to get the hang of
assembling the flowers, but I finally got the hang of it. I finished off by
attaching a small cobalt blue ribbon to tie in our wedding colours and voila!
2. Bride Hanger
I’m a very detail oriented
person, so every time I see pictures online of a gorgeous wedding gown hanging
on a hideous plastic hanger, it hurts my soul. For this project, I bought a wooden
hanger from the Dollar Store, broke off the bar to hang pants, and painted it
white. Confession: the blue wire was actually a happy accident; the store was
out of silver 12 gauge wire so I bought blue instead, and I find it pops so
much more! It
only took me three tries to get the letters the way I wanted, I simply found
some pictures of hangers I liked and freehanded the letters, using round things like fat
highlighters to shape the curves. I crazy glued the wire in the holes where the
pants bar was, slapped on a purdy little bow, and called it a day.
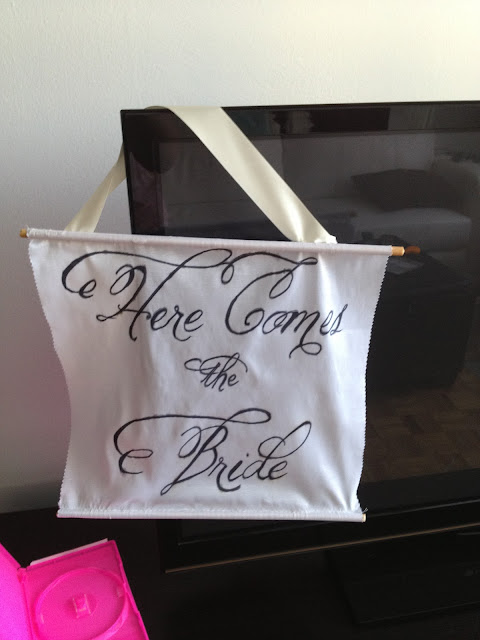
3. Here Comes the Bride Banner
Pinterest
is swarming with adorable pictures of little ones carrying signs like this down
the aisle, and if you recall, I had an extra flower girl with nothinh to carry. Boom. Problem solved!
 |
| Image via bridalguide.com/ Photo by Artisan Events |
I simply used the leftover taffeta from the ring pillow project to cut out a square and sewed it onto the bars I had removed from the hangers above. While doing this, keep in mind the height of the child that the sign is intended for, you don't want to make it too small or too big. Next, I freehanded the letters with a gel pen (careful to avoid bleeding), sewed on a thick ribbon and I was done! All while watching 27 dresses, not a terrible way to spend an afternoon ;)
What totally useless, yet adorable DIY projects is everybody up to?


No comments:
Post a Comment